How to Install the Authenticator Browser Extension for MFA
This page explains how to install the browser extension for the PC authenticator app.
■ Microsoft Edge (Chromium)
-
Open the following link in Edge:
https://microsoftedge.microsoft.com/addons/detail/authenticator/ocglkepbibnalbgmbachknglpdipeoio -
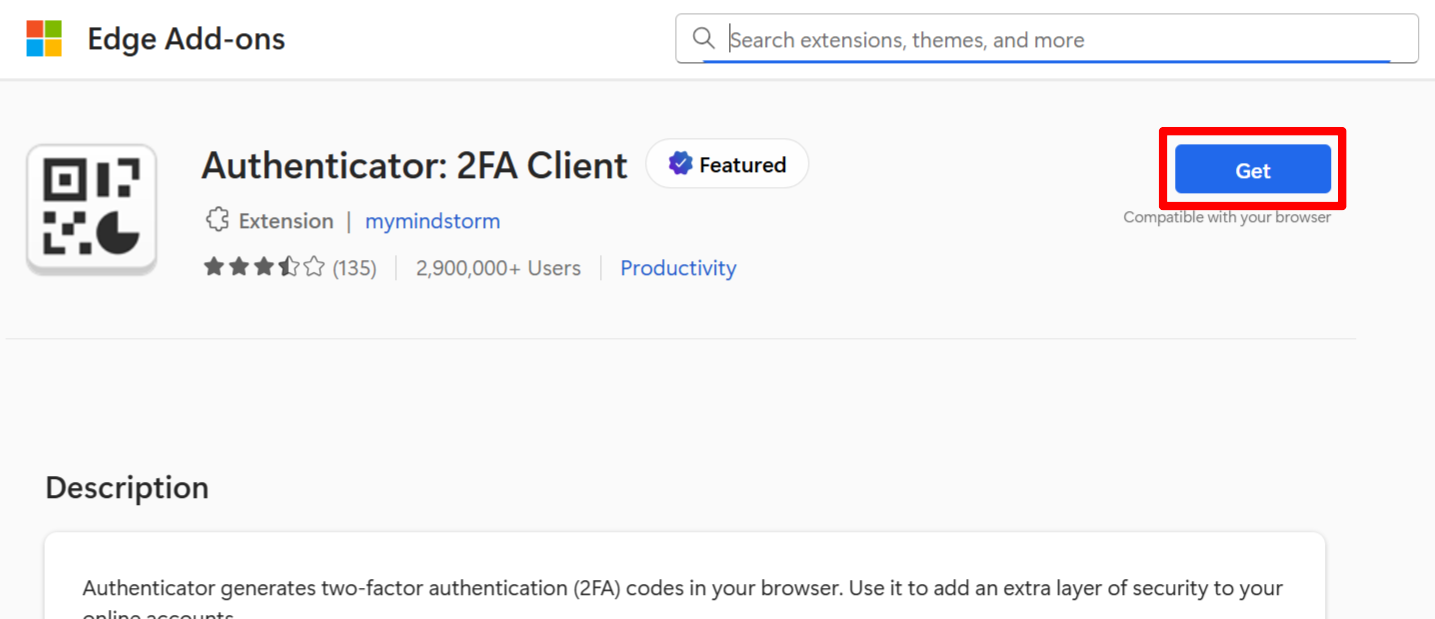
Click “Get.”
-
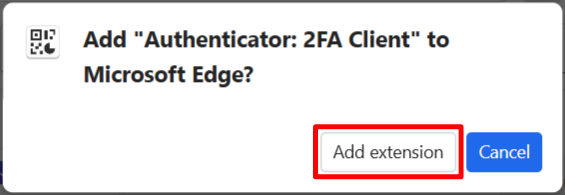
When a pop-up appears in the upper-right corner, click “Add extension.”
-
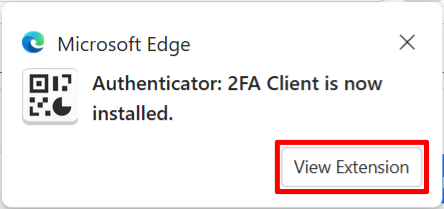
Click “View Extension.”
-
Click the pin icon next to “Authenticator: 2FA Client.”

-
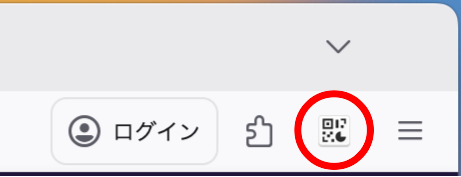
If the icon appears in the upper-right corner of the window, the installation is complete.
Return to Set Up MFA Information with Authenticator App (PC) and continue the registration steps.

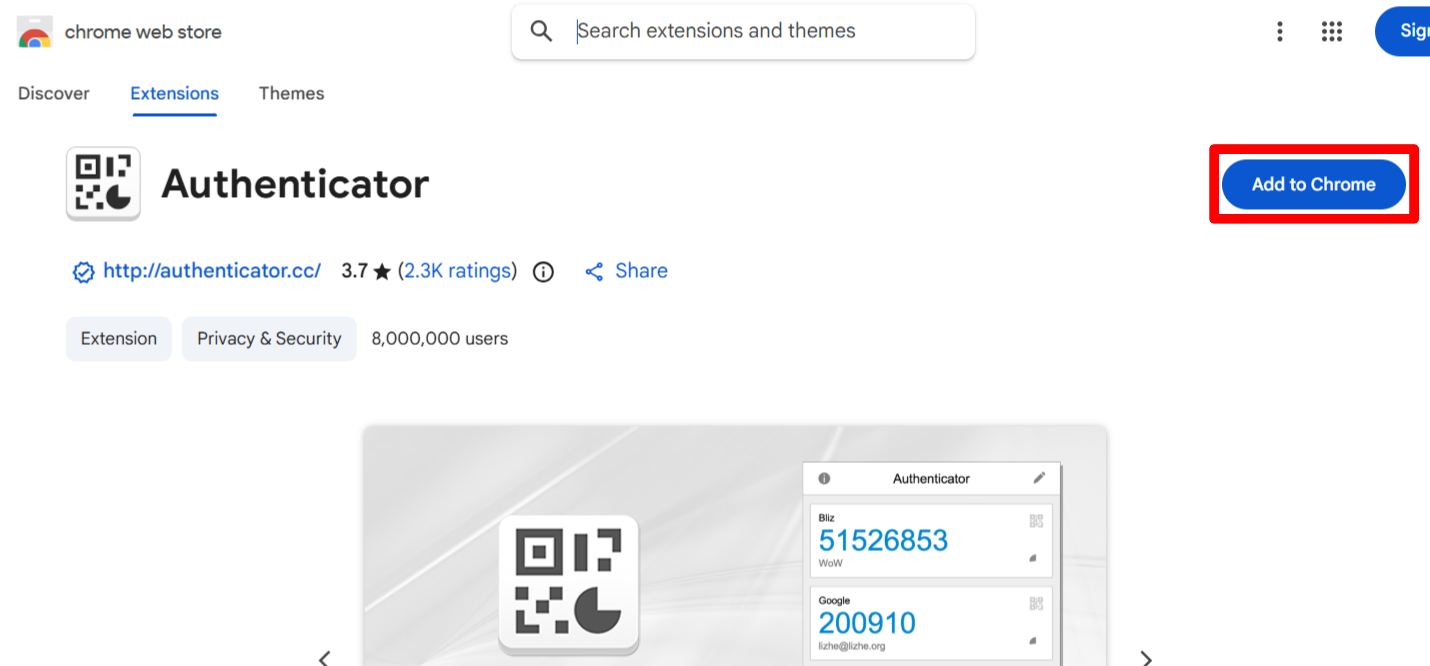
■ Google Chrome
-
Open the following link in Chrome.
https://chrome.google.com/webstore/detail/authenticator/bhghoamapcdpbohphigoooaddinpkbai -
Click “Add to Chrome.”
-
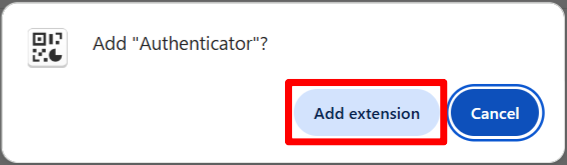
A pop-up will appear. Click “Add extension.”
-
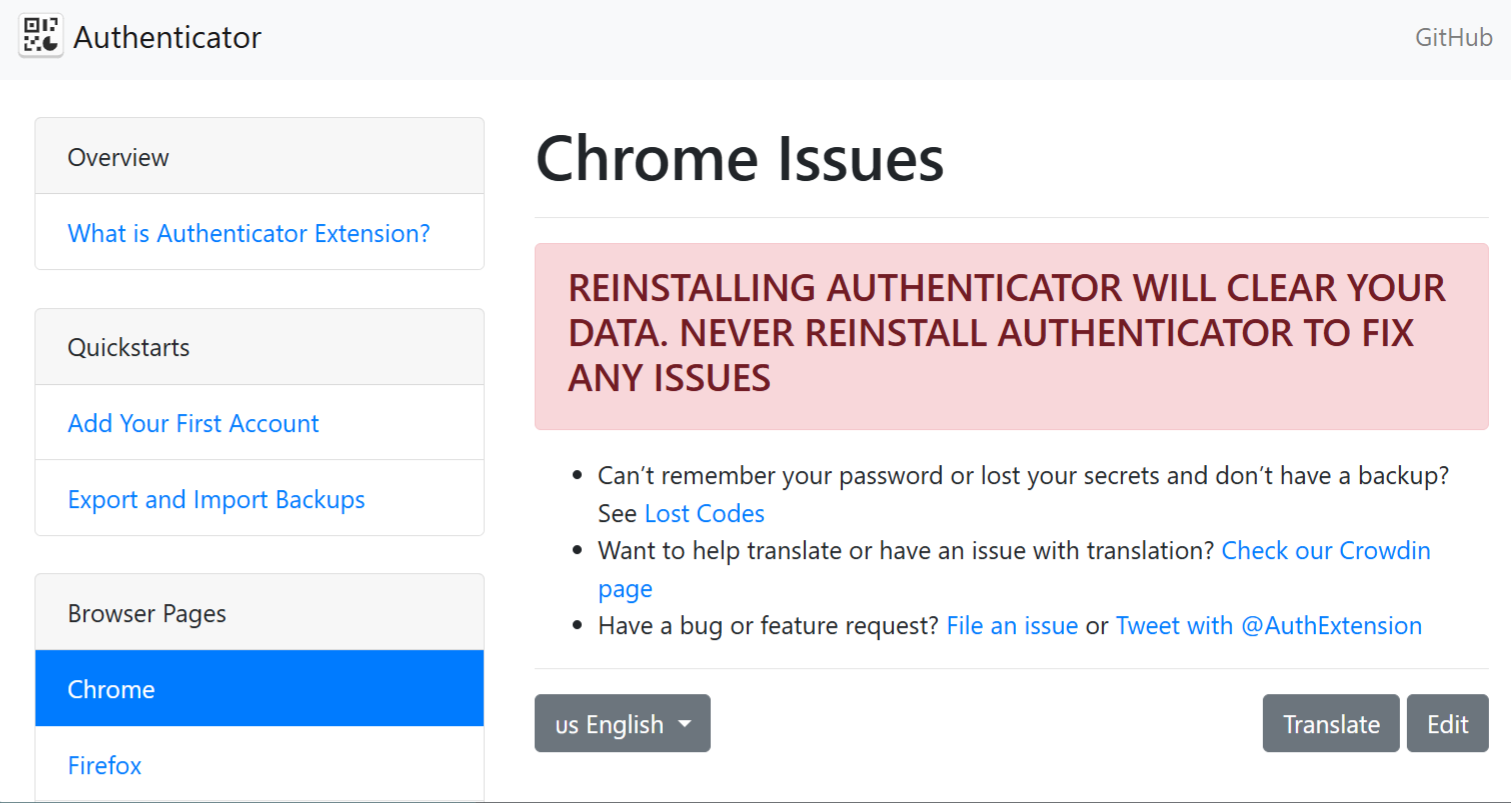
When you see this screen, the installation is complete.
-
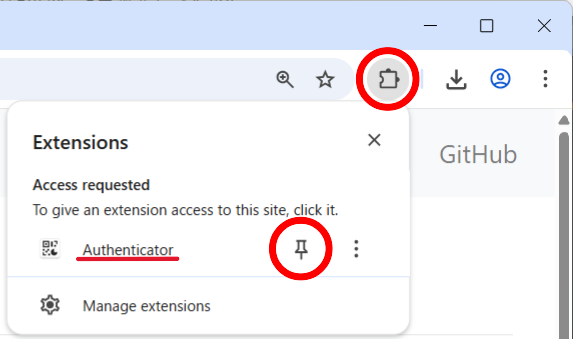
Click the icon in the upper-right corner to view the list of extensions. Click the pin icon next to “Authenticator.”
-
If the icon appears in the upper-right corner of the window, the setup is complete.
Return to Set Up MFA Information with Authenticator App (PC) and continue the registration steps.

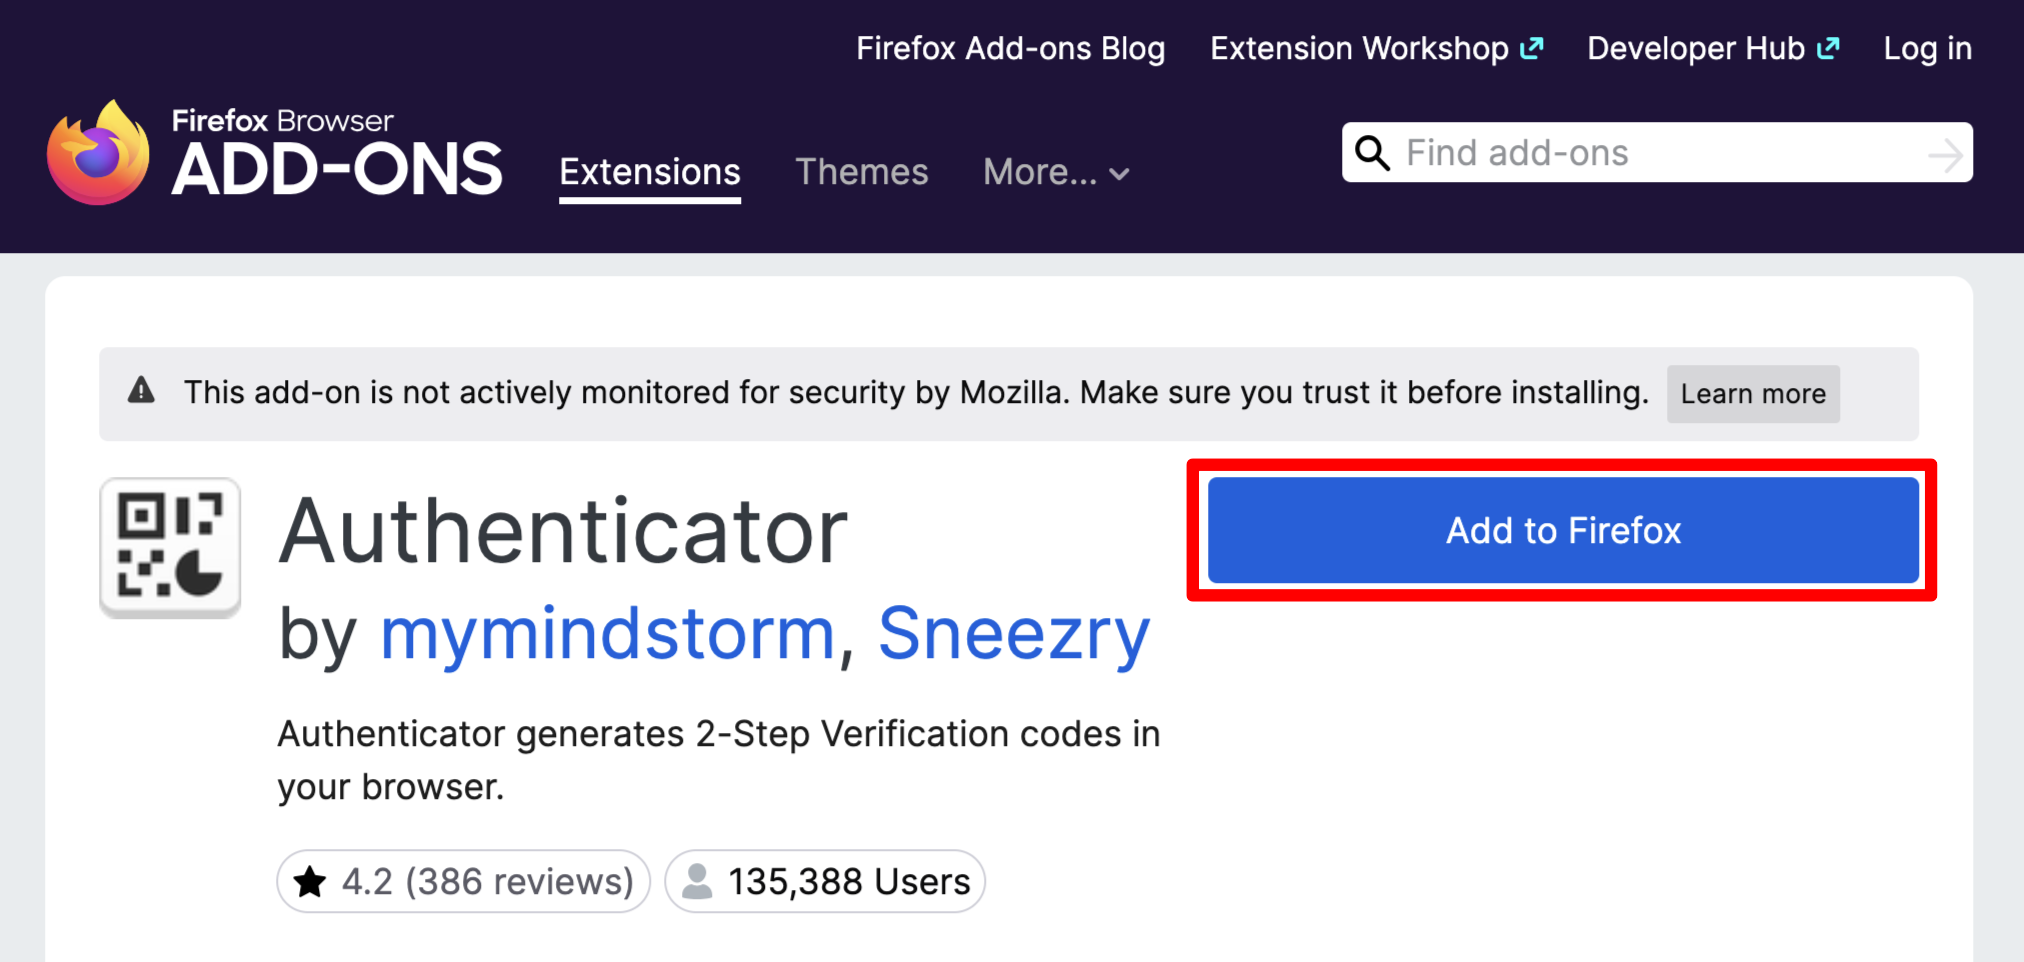
■ Mozilla Firefox
-
Open the following link in Firefox.
https://addons.mozilla.org/firefox/addon/auth-helper/ -
Click “Add to Firefox.”
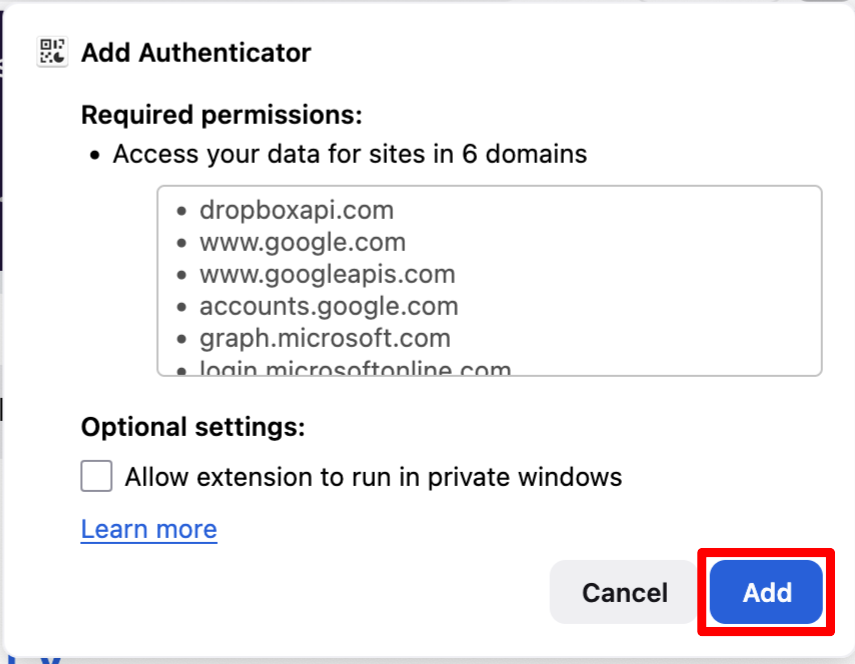
-
A pop-up will appear in the upper-right corner. Click “Add.”
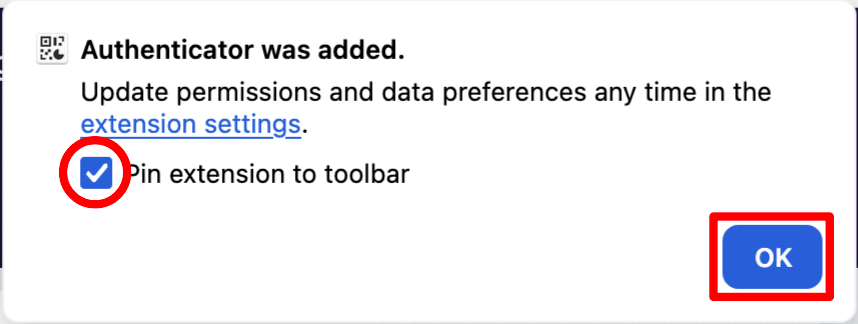
-
Check “Pin extension to toolbar”, then click “OK.”
-
If the icon appears in the upper-right corner of the window, the installation is complete.
Return to Set Up MFA Information with Authenticator App (PC) and continue the registration steps.