Send files

Users who have SSO-KID can pass the file to other people by “Web publishing”. When you “publish on the Web”, a URL indicating the location is automatically issued, and anyone who knows the URL can access the published file or folder with a browser. “Publish to the Web” is set for each file or folder, so if you want to pass multiple files at once, it is convenient to put them in a folder and publish the folder on the Web.
- Create a folder (If necessary)
- Upload files to the folder.
- Apply “Web publication (Web公開)” to the folder.
- Send the generated URL representing the “Web publication” location.
- Anyone can download files from the URL
By creating a folder for web publication in advance, uploading multiple files in it, and publishing the folder on the web, you can send multiple files at once. Creating a folder is unnecessary when passing a single file.
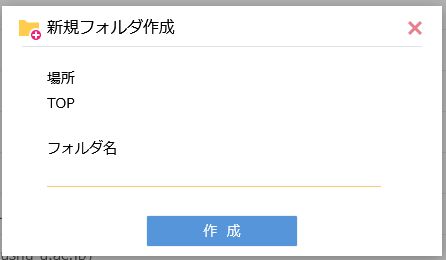
1. Create a folder(If necessary)
If you want to publish the folder on the Web, upload the folder together from your computer in step 2. Or create a public folder on Proself and upload the file there. To create a folder, click “新規フォルダ作成” from the menu on the left side of the screen. The following screen will be displayed. Specify the folder name and click “作成”.
2. Upload files to the folder.
If you created a public folder in step 1, select the folder name and move it inside (in the example shown, “外部提供用”). If you upload the entire folder and publish the folder, you can upload it anywhere. Next, click “Upload” from the menu list on the screen. There are two ways to specify files and folders to upload: drag and drop and select files individually. The figure is an example of the screen for dragging and dropping. On this screen, open the window of the file list with Explorer for Windows, Finder for Mac, and drag and drop the file you want to publish.
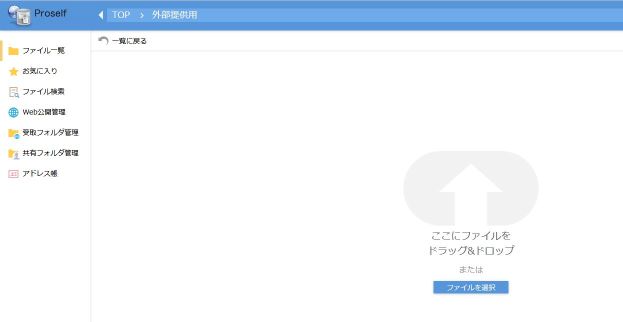
You will need to do web publishing operation after upload. When you finish specifying the file, click “Upload”. Clicking “Back to List” (一覧に戻る) will cancel upload.
3. Apply “Web publication (Web公開)” to the folder.
You can publish these files individually after uploading, or publish the folder itself. Right-click a file or folder and select “Web Publication” from the pop-up menu, or select multiple files by check boxes and click “Share” of the top menu and click “Web Publication”.
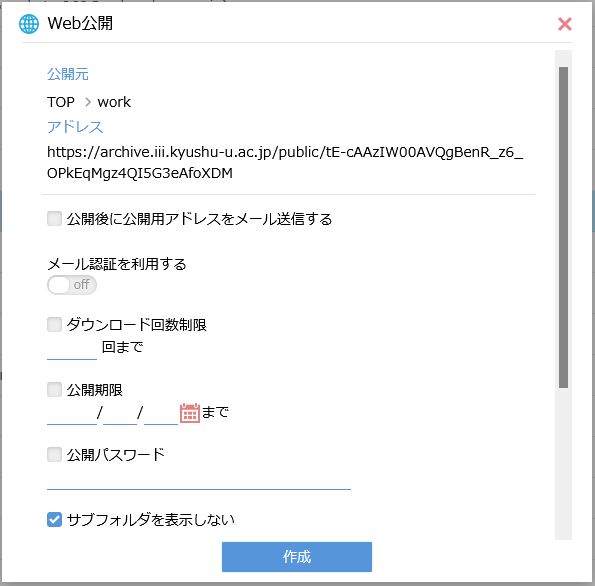
The web publishing setting screen will be displayed. If necessary, set the number of downloads, publication deadline, and password. If you want to publish a folder including subfolders, uncheck “Hide subfolders”. If you publish to the Web without specifying anything, there is no limit on the number of times, no deadline, no password, and the subfolder will not be displayed. Even without a password, the public URL is complex enough, as described below, so unless the URL is leaked, it is unlikely that an unrelated person will be able to download it.
4. Send the generated URL representing the “Web publication” location.
You can get the URL of the file you want to pass to the other by the following procedure.

Mouse over to the right icon like “a globe” in the line of web published file. Then the following window will open.

Click the URL to open the download screen, or right click to copy the URL. By clicking on the envelope icon on the right side, the mail sending screen containing the URL will open. You can set mail destination address, and add a message to the mail. Send the mail to the person who wants to receive the file.
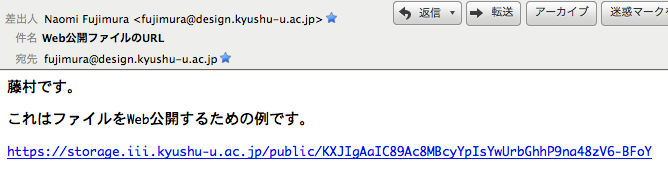
5. Download files from the URL.
Your recipient will receive a message like the following figure. They can follow this URL to download the file you published.